The key to a successful podcast lies in the skillful art of audio mixing. While it may go unnoticed when done right, poor audio mixing can ruin the entire listening experience. Audio mixing is all about balancing levels, adding effects, and fine-tuning the sound quality of your podcast to ensure that your message is not only heard but also felt by your audience.
Balancing levels involves managing volume, clarity, depth, and presence. This is what sets apart an amateur-sounding podcast from a professional-sounding one. Regardless of the topic of your podcast, how you mix your audio can significantly impact your listeners, either captivating them or pushing them away.
Guide Overview
The Basics of Sound and Audio Mixing
Sound is a wave; like any wave, it has amplitude, frequency, and phase. These properties are the building blocks of audio, and understanding them is critical to mastering your podcast’s mix. Amplitude affects sound waves’ loudness, frequency, pitch, phase, timing, and spatial relationship.
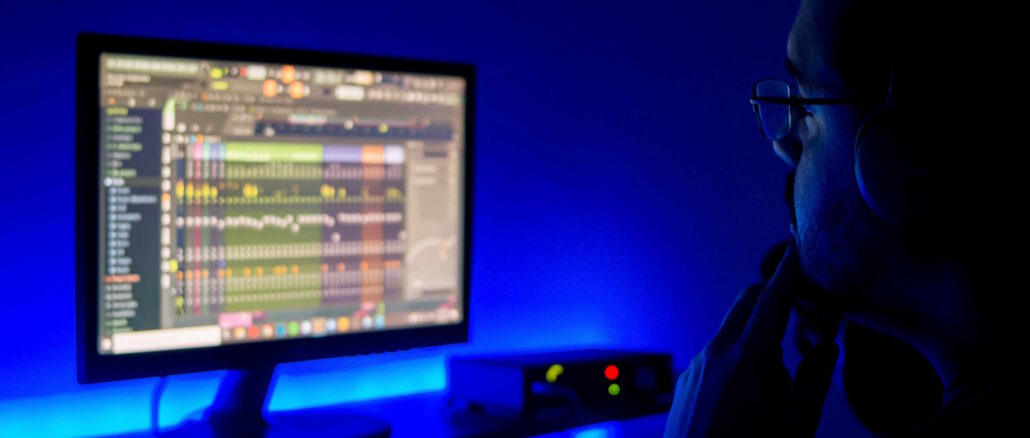
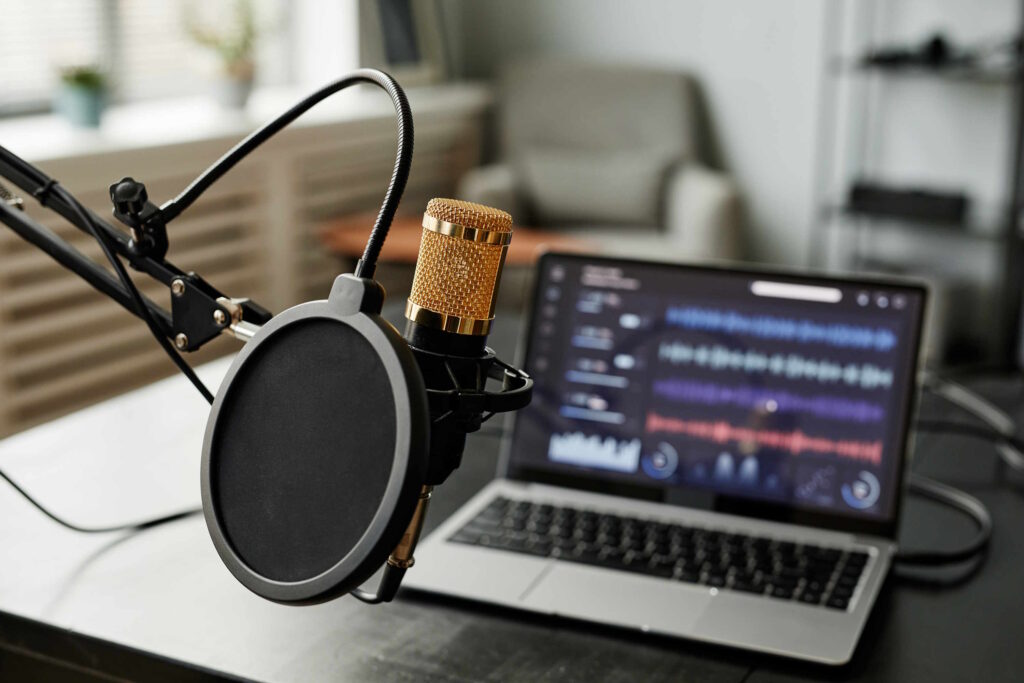
A typical podcast setup includes a microphone, an audio interface, headphones, and a computer with a Digital Audio Workstation (DAW). The microphone captures your voice as an analog signal, which the audio interface converts into a digital signal for your computer to process. Quality headphones are crucial for monitoring your audio with precision, and a reliable DAW is where the magic of mixing takes place.
The following sections delve deeper into the tools and techniques for transforming raw recordings into polished, professional podcasts.
Equipment Essentials
If you want to start a podcast, your audio equipment is very important. The right tools can make your podcast sound more professional and less like a hobby. Here’s a list of the essential equipment you need for podcast audio mixing:
Microphones:
- Dynamic Microphones: Ideal for recording speech, they are less sensitive to background noise and generally more durable.
- Condenser Microphones: Known for their sensitivity and broader frequency response, they are excellent for capturing detailed sound but may pick up more ambient noise.
- Here you can read more about Best Microphones for Podcasting: A Comprehensive Guide
Audio Interfaces:
An audio interface serves as the connection between your microphone and computer. It transforms the analog signal from your microphone into a digital signal that your DAW (digital audio workstation) can process.
When selecting an audio interface, it is recommended to choose one with preamps that can provide clean gain without any noise, and with enough inputs to meet your requirements.

Headphones:
- Closed-back headphones are preferred for recording, as they prevent sound from leaking into the microphone.
- Open-back headphones are favored for mixing, as they provide a more natural and open soundstage, which helps with detailed audio work.
Mixers:
While not essential for beginners, a mixer can provide more control over audio with multiple inputs, effects, and EQ settings. For further information on mixers, please refer to this article.
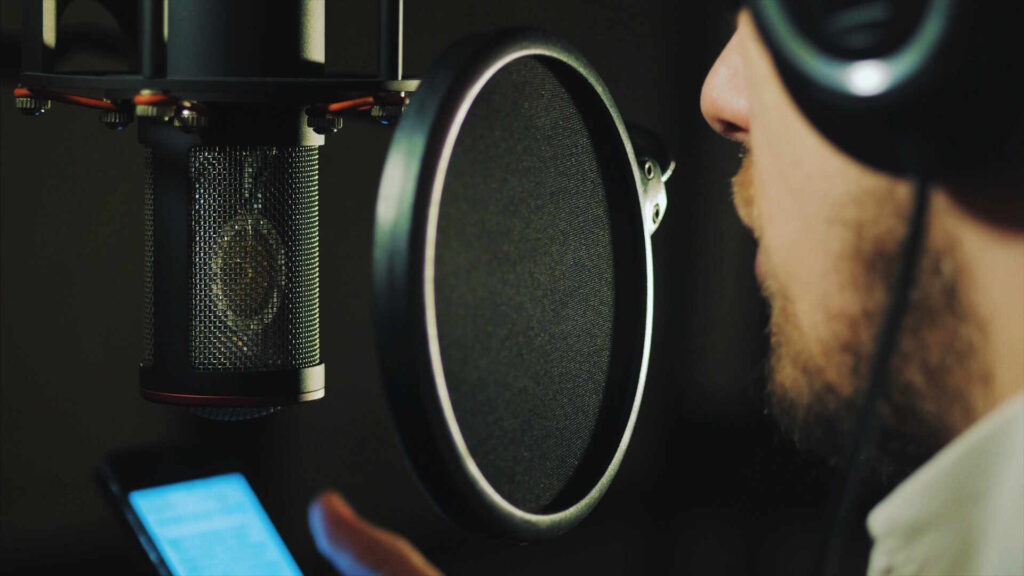
Pop Filters:
- A pop filter is a simple screen that sits between your mouth and the microphone, reducing plosive sounds that can cause peaks in your audio.
Stands and Mounts:
- Proper stands or mounts keep your microphone stable and at the right height, reducing handling noise and allowing you to maintain a consistent position.
Acoustic Treatment:
Acoustic panels, diffusers, and bass traps can help control the sound within your recording environment, reducing unwanted reverb and echo. You can read more about reducing unwanted sounds while recording here.
Choosing the right equipment is crucial for clear audio capture. High-quality microphones and interfaces ensure your voice is recorded cleanly, without noise or distortion. Good headphones allow you to hear your mix accurately, and acoustic treatment helps to prevent your recording space from coloring the sound in undesirable ways.
Investing in the right equipment can save you time and frustration and provide your listeners with the best audio experience. Remember, your audience may forgive a subpar video, but poor audio is often unforgivable in podcasting.
Digital Audio Workstations
Digital Audio Workstations (DAWs) are the epicenter of audio mixing and editing in the world of podcasting. A DAW software platform allows you to record, edit, mix, and master audio files. Here are some popular DAWs used in podcasting, each with its own set of features and workflows:
Audacity:
- Pros: Free and open-source; user-friendly for beginners.
- Cons: Limited advanced features compared to professional DAWs.
Adobe Audition:
- Pros: Part of the Adobe Creative Suite, a robust set of tools for editing and mastering.
- Cons: Subscription-based pricing model.
GarageBand:
- Pros: Free for macOS users; intuitive interface.
- Cons: Exclusive to Apple products; not as feature-rich as professional DAWs.
Logic Pro X:
- Pros: Advanced features for macOS users; seamless integration with GarageBand projects.
- Cons: Paid software; available only on macOS.
Pro Tools:
- Pros: Industry-standard software; extensive features for professional audio production.
- Cons: Steeper learning curve; subscription or perpetual license required.
Reaper:
- Pros: Affordable, highly customizable, and extensible.
- Cons: Less intuitive for beginners; requires additional setup.
When it comes to mixing, DAWs offer a variety of basic features that are essential for producing a well-balanced podcast:
Track Layers:
- Allows you to organize different audio elements on separate tracks for easier management and adjustments.
Clip Editing:
- Enables precise trimming, splitting, and arranging of audio clips.
Volume Faders:
- Provides control over the volume of individual tracks to balance the mix.
Panning Controls:
- Adjusts the stereo placement of sounds, helping to create a sense of space.
Equalization (EQ):
- Shapes the tonal balance by boosting or cutting specific frequency ranges.
Compression:
- Evens out dynamic range, ensuring consistent volume levels.
Effects and Plugins:
- Enhances the audio with reverb, noise reduction, and other effects to improve sound quality.
Automation:
- Automates changes in volume, panning, and effects over time for dynamic mixing.
Understanding and utilizing these features can significantly improve the quality of your podcast. While the choice of DAW largely depends on personal preference and budget, the fundamental mixing principles remain the same across all platforms. By familiarizing yourself with these tools, you can take your podcast’s audio from good to great, ensuring that your content stands out in the ever-growing world of podcasting.
Setting Up Your Mix
Before diving into the creative aspects of mixing, it’s essential to establish a solid foundation. This begins with setting up your mix correctly, which involves initial level setting and understanding the concept of headroom.
Initial Level Setting:
- Start by setting the levels of your tracks to ensure that each voice or sound is audible without any one element overpowering the others.
- Use the meters in your DAW to monitor the levels. Aim for peaks around -18 dBFS (decibels relative to full scale) for each track, considered the ‘sweet spot’ for digital audio recording.
- This initial setting provides a balanced starting point and prevents any single track from causing clipping or distortion.
The Importance of Monitoring Levels:
- Constantly monitor your levels throughout the recording and mixing process. Levels can change as you add effects or when multiple tracks play simultaneously.
- Use visual meters and your ears to ensure consistent levels and no sudden jumps in volume.
Headroom:
- Headroom is the difference between the peak level of your signal and the maximum level before distortion (0 dBFS in digital systems).
- Maintaining proper headroom is crucial in podcasting because it allows for dynamic range and prevents digital clipping.
- Aim for a maximum peak level of -6 dBFS on your master fader. This leaves enough headroom for mastering, where final volume adjustments are made.
Why Headroom Matters in Podcasting:
- Podcasts often feature dynamic speech with varying levels of loudness. Adequate headroom ensures that louder moments don’t clip and quieter moments remain audible.
- It also provides post-production flexibility, allowing for adding music or sound effects without overloading the mix.
You create a clean and professional audio canvas by carefully setting up your mix and maintaining proper headroom. This preparation allows you to focus on the creative aspects of mixing, secure in the knowledge that your technical bases are covered.

Balancing Speech
Balancing speech is critical to podcast mixing, especially when multiple speakers are involved. The goal is to maintain clarity and consistency so that each voice is distinct and no single speaker dominates the conversation. Here are some techniques and tools to achieve this:
Techniques for Balancing Multiple Speakers:
- Volume Leveling: Start by setting each speaker’s volume to ensure they are all audible at a consistent level. This may involve raising the level of quieter speakers and reducing the level of louder ones.
- Panning: In a multi-speaker setup, subtle panning can help separate speakers in the stereo field, making it easier for listeners to distinguish between them.
Enhancing Speech Intelligibility with EQ:
- High-Pass Filter: Apply a high-pass filter to remove low-frequency rumble and focus on the clarity of the speech.
- Presence Boost: Gently boost the frequencies around 3-6 kHz to enhance the presence and intelligibility of the speech.
- De-Essing: Use a de-esser or targeted EQ to tame harsh sibilance in the 5-8 kHz range.
Using Compression:
- Consistent Volume: Compression helps to even out the dynamic range of each speaker, ensuring that their volume remains consistent throughout the podcast.
- Attack and Release Settings: Adjust the compressor’s attack and release settings to preserve the natural cadence of speech while controlling volume spikes.
- Ratio and Threshold: Set the compression ratio and threshold to apply the right amount of compression without over-processing the audio.
Additional Tips:
- Normalize: After balancing and processing, normalize the audio to bring the overall level up to a standard loudness, typically around -16 LUFS for podcasts.
- Check for Phase Issues: When using multiple microphones, ensure they are in phase to avoid cancellations affecting clarity.
By carefully applying these techniques and tools, you can create a balanced and professional-sounding mix that allows your audience to follow the conversation quickly. Remember, the key to a great podcast is not just what you say but how clearly and pleasantly it can be heard.
Adding Music and Effects
Music and sound effects can significantly enhance the listening experience of a podcast, setting the mood and emphasizing key points. However, it’s essential to integrate these elements without detracting from the primary content: the speech. Here’s how to achieve this delicate balance:
Incorporating Music and Sound Effects:
- Volume Balance: Ensure that music and sound effects are at a lower volume level than the speech. They should complement, not compete with, the dialogue.
- EQ Filtering: Apply EQ to music and sound effects to carve out frequencies that clash with the vocal range, typically around the mid-range frequencies.
- Use of Ducking: Ducking automatically lowers the volume of music when someone is speaking, then raises it back up when there’s a pause or silence in the dialogue.
Using Automation for Dynamic Adjustments:
- Volume Automation: Automate the volume of music and sound effects to increase or decrease at specific moments, ensuring they don’t overpower the speech.
- Panning Automation: Use panning automation to move sound effects within the stereo field to create a more dynamic and immersive soundscape.
- Effect Automation: Automate effects like reverb or delay on sound effects to add depth and texture at the right moments without overwhelming the main content.
Tips for a Cohesive Mix:
- Consistency: Keep music and sound effects consistent throughout the podcast to create a cohesive listening experience.
- Relevance: Choose music and sound effects relevant to the podcast’s content and contribute to the storytelling.
- Testing: Always test the mix on different playback systems to ensure the balance works well on various devices, from headphones to car speakers.
By thoughtfully adding music and sound effects and using automation to adjust levels dynamically, you can create a rich and engaging audio environment that enhances your podcast without overshadowing the most crucial element—the spoken word. Remember, the goal is to complement the narrative, not distract from it.
Common Challenges and Solutions
Podcasting, like any other form of media production, comes with its own set of challenges. Here are some common audio issues podcasters face, along with solutions to overcome them:
Challenge 1: Inconsistent Audio Levels
- Solution: Use a combination of manual volume adjustments, compression, and normalization to achieve consistent levels across all speakers and episodes.
Challenge 2: Background Noise
- Solution: Record in a quiet environment, use directional microphones, apply noise gates, and use noise reduction tools in your DAW to minimize unwanted sounds.
Challenge 3: Poor Audio Quality
- Solution: Invest in good-quality microphones and recording equipment. Ensure your recording space is acoustically treated to avoid reverb and echo.
Challenge 4: Plosives and Sibilance
- Solution: Use pop filters to reduce plosives (“p” and “b” sounds) and de-users to tame sibilance (sharp “s” and “t” sounds).
Challenge 5: Audio Clipping
- Solution: Monitor input levels carefully to prevent clipping. If clipping occurs, lower the gain on your microphone or interface.
Challenge 6: Muddy Mixes
- Solution: Apply EQ to each track to ensure each voice has space in the frequency spectrum. Avoid overlapping frequencies that can cause a mix to sound muddy.
Challenge 7: Phase Issues
- Solution: Using multiple microphones, ensure they are correctly positioned to avoid phase cancellation. Check the phase coherence in your DAW.
Tips for Maintaining Balance with Varying Audio Sources:
- Consistent Recording Techniques: To maintain consistency, use the same microphones and recording settings for each episode.
- Reference Tracks: Compare your podcast to professionally produced podcasts to gauge levels and quality.
- Regular Checks: Periodically check your mix on different playback systems to ensure balance and clarity.
- Listener Feedback: Pay attention to feedback from your audience regarding audio quality and adjust your mix accordingly.
By anticipating these challenges and implementing the suggested solutions, you can ensure that your podcast’s audio quality is top-notch, providing your listeners a pleasant and engaging experience every time they tune in. Remember, the best podcasts are those that sound as professional as their content is compelling. Happy podcasting!
Finalizing Your Podcast Mix
The final steps in the mixing process are crucial to ensure that your podcast sounds professional and enjoyable to listen to on any platform.
Normalization and Limiting:
- Normalization adjusts the overall level of your mix to meet a standard loudness level, typically around -16 LUFS for podcasts, ensuring consistency across episodes.
- Limiting is applied to the master track to prevent any peaks from exceeding 0 dBFS, which would result in distortion. It acts as a final safeguard against clipping.
Final Listen-Through:
- It’s essential to listen to your final mix on different devices, such as headphones, car speakers, and smartphone speakers. This ensures that your podcast sounds good no matter how your audience chooses to listen.
- Pay attention to the balance and clarity of speech, the presence of music and effects, and the overall loudness of the mix.
Conclusion: In this guide, we’ve covered the critical aspects of audio mixing for podcasting, from understanding the basics of sound to finalizing your mix. We’ve explored equipment essentials, DAWs, setting up your mix, balancing speech, adding music and effects, and addressing everyday challenges.
Balancing levels is a skill that comes with practice and patience. Don’t be discouraged by initial challenges; every mix is an opportunity to learn and improve. Stay curious, keep experimenting with techniques, and always strive to enhance your mixing skills.
Additional Resources:
For further learning, consider exploring the following resources:
- Podcasting Tutorials: Websites like Lynda, Coursera, and Udemy offer beginner to advanced-level courses.
- Forums: Join communities like Gearspace, Reddit’s r/podcasting, and Podcasters’ Support Group on Facebook to connect with fellow podcasters.
- Books: Look for titles on audio production and mixing, such as “Mixing Secrets for the Small Studio” by Mike Senior.
Remember, mixing for podcasting aims to deliver a clear, engaging, and professional audio experience for the listener. With dedication and practice, you can craft mixes that captivate your audience and leave them eagerly awaiting your next episode. Good luck with your article, and happy podcasting!
Be the first to comment